Parking Guide to Disneyland
I’m back! (insert elongated loud holler here) I took some time off from blogging while we were traveling last week, but I am back and ready to share some much needed content about Disneyland Parking. If you’re like me and you had never parked at Disneyland prior to this, and you want all the details on how to make parking easy and convenient while enjoying the most magical place on earth, this post is for you.
In this past trip to Irvine, CA. I had the hair brained idea to do Disneyland solo with LBB. Last week had a few of the least expensive adult tickets for the year, ($104 per adult) so I figured why not take advantage of LBB still being a ‘guest of Mickey’ since she is under 3 and enjoy a fun filled day at the park. This was not a trip dedicated solely to Disney, so we were not staying at a hotel that was within walking distance to the entrance. Thus, ensued my panicked research on Disney Parking. I was actually very disappointed at the lack of information on the internet about this topic. Even Disneyland’s own site was not the easiest to navigate and determine your best parking plan. Mostly, the interactive maps felt challenging to navigate for some reason on their site. So after about an hour of searching. This is what I sorted out:
There are 3 main parking zones for both Disneyland & California Adventure:
Mickey & Friends Parking Structure
Pixar Pals Parking Structure
Toy Story Parking Area

Map of the 3 main parking options for Disneyland & DCA
Both Mickey & Friends and Pixar Pals Parking Structures pedestrian exits face each other and funnel into the same security entrance prior to passing through to wait for the trams. The trams come every 3 minutes and take you parallel to downtown Disney and drop you right at the end of the ticketing booths between DCA and Disneyland. The walk from there into the gates is very short, less than 3 minutes. These parking structures are their own city. They. Are. Huge. When I drove into Mickey & Friends, it felt like I was driving into a 10 lane monster that I would likely never find my way out of unless directed by a professional. Just for reference, when you enter, pick the lanes on the far left or far right to get your parking voucher scanned. They are almost always shorter lines than the middle. But turn into those lanes early because barricades and lane demarcated cement support columns stop you from sneaking over once you’ve driven in the garage too far. I chose to purchase a parking voucher when I bought my ticket online. ($35 for the day to enter any of the 3 indicated lots above, with in and out privileges) I just thought it would save me time and energy when driving into the lots, and I was right. Just pop open your voucher on your phone, scan with a ticketing agent, and make sure you hang on to your receipt so that you ensure you have in and out privileges all day. I just left mine on the dash of our rental car to be safe. Once you pass the ticketing booth in the lot, cast members direct you to your right to head up the 90 degree angle ramp to the 5th (or 6th floor) depending on what time you arrive. Then you just maneuver your way through the lot directed by cast members and cones (if you’re there early morning) to the nearest parking spot. It felt like I was in the Fast & Furious when all the cars pulled into parking spots one after the other in perfect formation. Oddly satisfying. At that point, we had weaved through enough of the parking garage that I honestly couldn’t even tell you where we were or what day it was. It’s that big. Luckily, Disney knows you need some help in this department and has signs everywhere directing you towards the elevators/escalators indicated by the “to parks” signs overhead. Every floor of the garage has a Disney character assigned to help orient yourself when you return. We parked on the “Donald Duck” Floor (i.e. the 5th floor) near column 10G. Please do yourself a favor and take a picture of the nearest column for reference. You’ll need it later! Everyone is excited to get to Disney and it’s so easy to forget where you parked after a long day. If you’re traveling with a stroller, head to the elevators to make your way down to the ground floor, if not, head to the escalator (much faster and goes straight to the ground floor from the 5th floor. Each floor has a dedicated escalator (except 6 which is a short escalator add on from the 5th floor). The efficiency of this makes my heart sing. NOTE: If you’re anything like me and your bladder was full from being caffinated to the max pre-park play, there are restrooms directly to the left of the elevators on the ground floor. Make a pitstop here before going through security! The next one won’t be until you get into the park… POST NOTE: I’ve read that there isn’t a restroom in the Pixar Pals lot, so if you need to use the Loo…you’ll have to walk across to Mickey & Friends Lot.

Donald Duck column for reference.
Since Mickey & Friends and Pixar Pals Lots face each other like I mentioned above, it can be easy to get turned around, however, there are two HUGE indicators directly in front of each lot indicated by the famous Pixar Ball, and a Mickey Head. (see images below). Then from there you just zip through security and wait for your tram. Just note; you will have to collapse your stroller when you get on the tram. If you’re traveling with an extra large stroller or just would like more space, the first seats behind the drivers car have the largest benches, originally dedicated for those with accessibility needs. The tram ride is very quick, less than 10 minutes to embark and disembark, and again they come very frequently so you are rarely waiting long to shuttle back and forth to your vehicle. I was really sceptical about how much travel time it would take to get to and from your car, since I knew I wanted take a midday nap break back at our hotel. All and all it was about 30 minutes give or take from getting all the way into Disney, and then back out into our vehicle. At night, by the time we decided to call it quits, it was about 40 minutes. Just something to factor in for planning purposes. The drive out of the lot is well indicated, and luckily all signs once you exit the garage are very clearly marked and take you directly to i-5 N/S and several other offshoots to get you to your destination. When you return to the lot later in the day, the same rules apply, but you’ll likely be directed straight to the 6th floor (top of the parking garage open air parking). Just make sure you reup your photo of the column where you parked! Just so you don’t get confused from where you landed in the morning. You can also use the Car Locator via the Disneyland App too if you’re in a pinch. For me, it just felt easier to snap a photo and get moving vs. fiddle around with the app to add that info.

Mickey Ears indicating the Mickey & Friends Parking Lot

Pixar Ball indicating Pixar Pals Lot
Originally, when I was doing research for where I wanted to park, I was actually leaning towards parking in the Toy Story Parking Lot and using the buses that drop you at the Promenade. This was partially because I thought it would be faster to get into the park after getting through security. However, after ending up at the Mickey & Friends lot on accident (random story that can be saved for another time) I think it’s truly equidistant and both have pros and cons. The Toy Story Parking Lot is on S Harbor Blvd which is where we typically stay, so I thought perhaps I’d have a better grasp of my bearings since I was moming solo for the morning. Perhaps, next time we drive to Disney we’ll park here and I can really tell you the differences. I’ve read that the buses are slightly slower to get in and out of the park than the trams, so perhaps it worked out in the end by accidently parking in the Mickey & Friends lot.
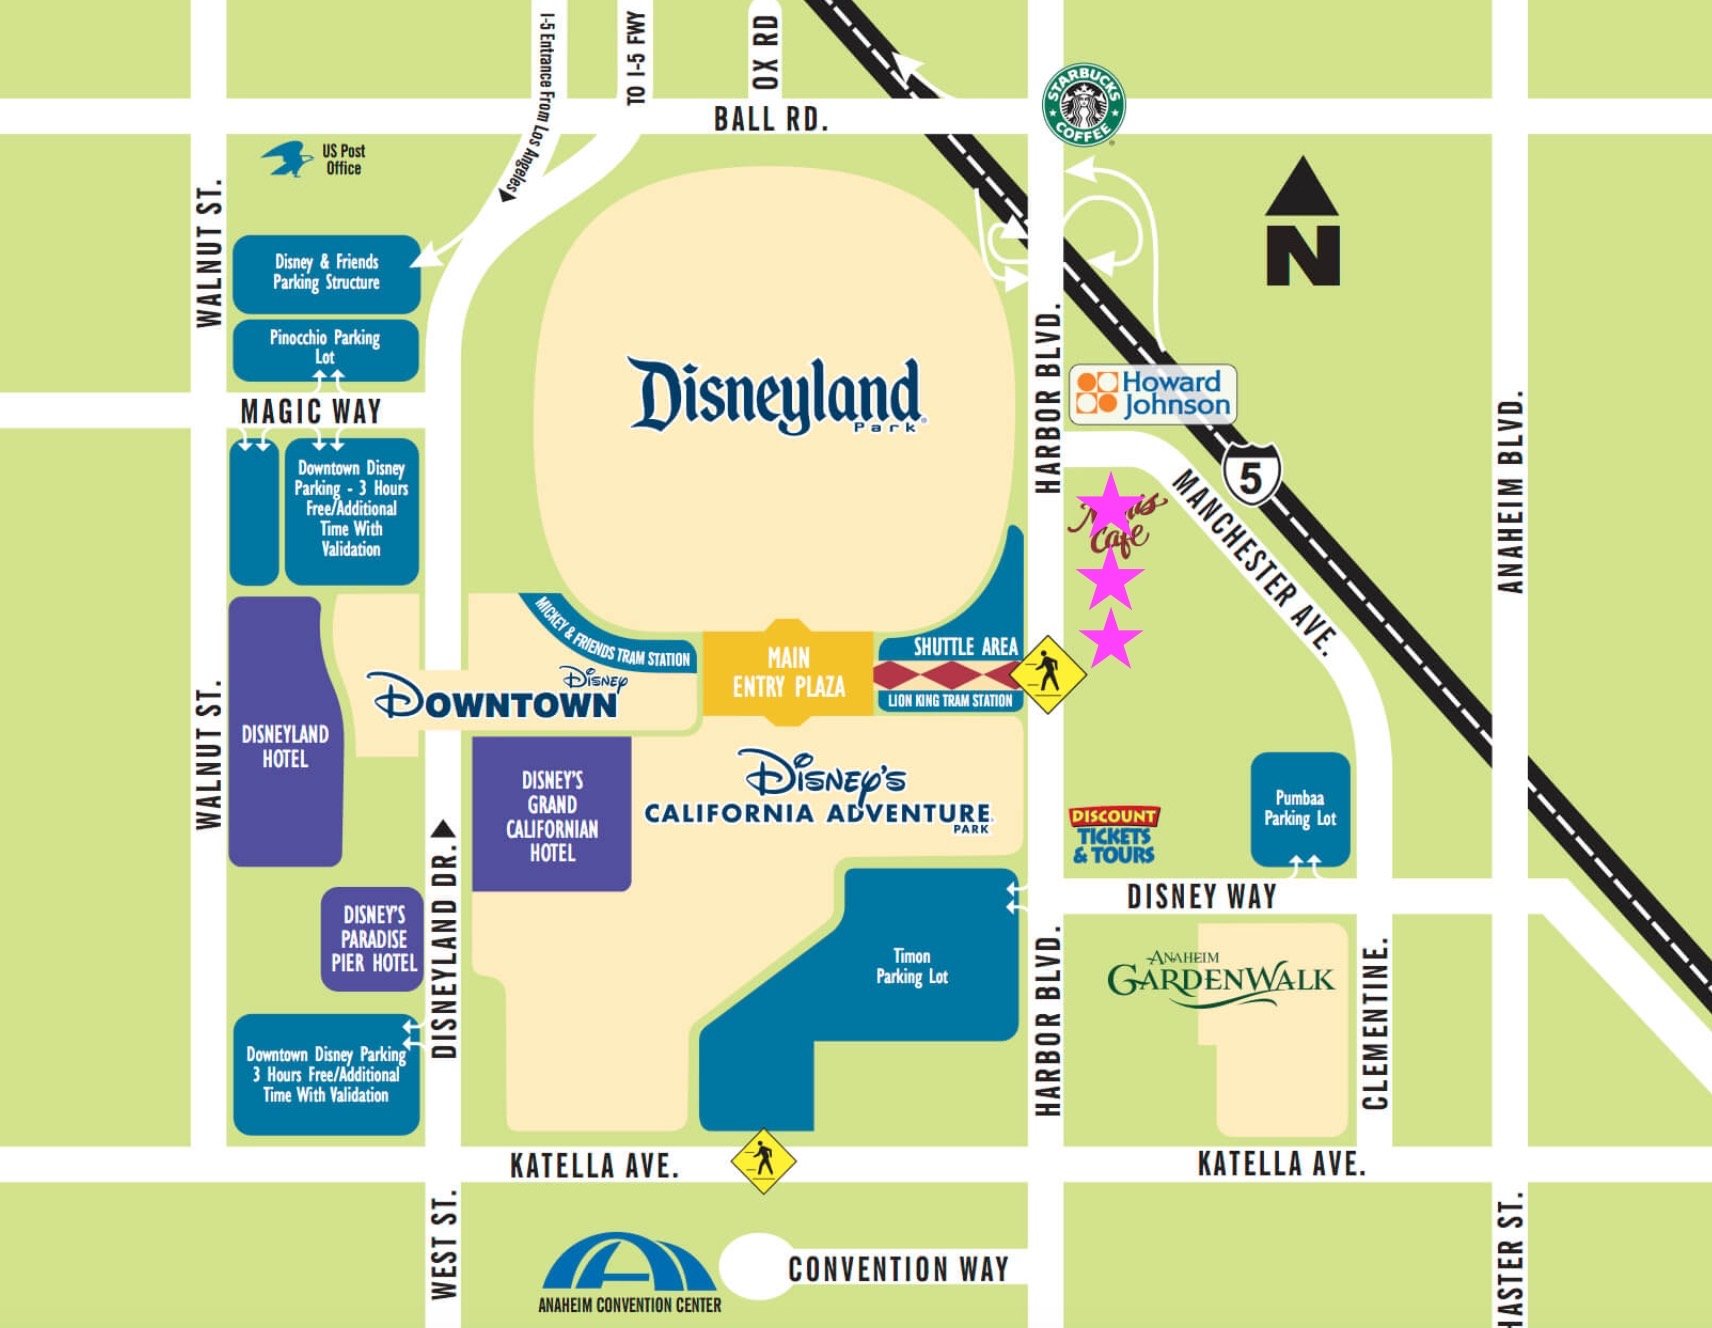
Parking Map: Pink Stars indicate Hotels on Harbor/S Harbor Blvd with Day Parking
One last ditch research effort I did prior to making my final decision on where to park, was calling a few of the hotels near where we’d stayed previously to see if they had availability to park for the day as a non-hotel guest. The reasoning behind this logic was the following… walking distance to the park without the hassle of addition busses or trams to wait for when bringing LBB in tow. The Fairfield Inn by Marriott is our go to hotel since it has easy access to the freeway and it is walking distance to the entrance of the park. The idea of being constrained to additional transportation after parking and considering the opening and closing of the stroller clearly had me wherry, especially since I knew I wanted to leave mid-day for a nap and come back. So… here are my findings. Majority of the hotels on S Harbor Road do offer limited day parking on a first come first serve basis for non-hotel guests. However, there are no in and out privileges. So once you’re in… you’re stuck. Most hotels charged $42.50 for the day, not including tax so you’d wind up spending just shy of $50 to reserve the right to walk to the park. I think I’d actually consider this if LBB was old enough not to be napping any longer and I knew I’d be able to stay at the park the whole day. However, with the uncertainty of ‘if’ there would even be a spot available, and the inability to go in and out… it wasn’t worth it for me this go around.
Lastly, there was a bunch of info on the Disney website about additional parking for Downtown Disney District that you can pay for by the hour, but can also stay for longer stretches of time. They have some complimentary time as well if you purchase something at one of the restaurants or shops I believe. However, it was convoluted, and I believe it’s designed more for those coming for a character breakfast at a hotel and leaving shortly thereafter.
Additional Parking Resources & Costs for Themed Parking:
$35 per car or motorcycle
$40 per oversized vehicle, motor home or tractor (without trailer) – at the Toy Story Parking Area only
$45 per bus or tractor (with extended trailer) – at the Toy Story Parking Area only
Prefered Parking $55
Final Tips:
Disney has found a way to make parking accessible and somewhat convenient for those not staying close to the resort. But make sure you are planning for at least 30-40 minutes for travel time to and from the resort.
Parking structures open one hour before the parks do so this can make the ability to get into the park by rope drop possible
The earlier you get to the garages, the better for obvious reasons (less crowded, better positioning to get out later)
Take pictures of where you park! Or use the Disney app parking assist to help you not loose your mind finding your car later :)
Hope this helps you enjoy your next trip to the Parks! Happy Trails!